 Save
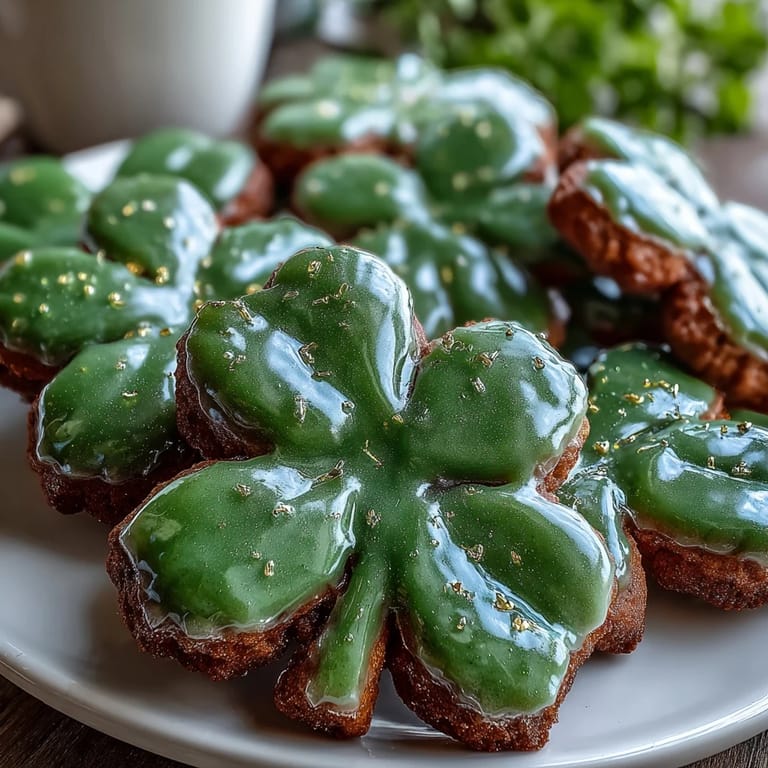
Save My kitchen smelled like butter and vanilla the morning my neighbor stopped by with a shamrock-shaped cookie cutter she'd found at an estate sale. We laughed about the timing, considering St. Patrick's Day was only two weeks away, and suddenly I was committed to making these little green treasures. What started as a casual chat over coffee turned into an afternoon of baking, piping, and taste-testing, proving that the best recipes often arrive unexpected, wrapped in good conversation.
I made a batch for my daughter's school party, and watching her face light up when she saw the shamrock tower I'd built was worth every minute of piping. One little boy told me they were too pretty to eat, then proceeded to demolish three anyway, which felt like the highest compliment.
Ingredients
- All-purpose flour: The foundation of every tender cookie; measuring by weight rather than scooping ensures you don't pack it too tight and end up with dense, crumbly results.
- Baking powder: Just a whisper of it helps the cookies rise slightly and become delicate rather than heavy.
- Salt: Even in sweet cookies, salt brightens the vanilla and makes every flavor sing.
- Unsalted butter, softened: Cold butter won't cream properly with sugar, so take it out of the fridge about thirty minutes before you start; you'll know it's ready when your finger leaves a slight indent.
- Granulated sugar: The creaming process with butter creates air pockets that make cookies tender; don't skip this step or rush it.
- Egg: Room temperature eggs blend smoothly and help bind everything together without deflating your hard-won fluffiness.
- Vanilla extract: Use real vanilla if you can; the flavor difference is subtle but noticeable in something this simple.
- Almond extract: Optional, but it adds a sophisticated warmth that makes people ask what your secret ingredient is.
- Powdered sugar: Sift it even if you think you don't need to; lumps will sabotage your icing smoothness and make piping frustrating.
- Meringue powder: This is the magic that makes royal icing set firm and shiny; find it in the baking aisle with cake decorating supplies.
- Water, room temperature: Cold water fights you when you're trying to achieve the right icing consistency, so let it sit out first.
- Green gel food coloring: Gel is more concentrated than liquid coloring, so you won't dilute your icing and end up with a runny mess.
Tired of Takeout? 🥡
Get 10 meals you can make faster than delivery arrives. Seriously.
One email. No spam. Unsubscribe anytime.
Instructions
- Combine your dry ingredients:
- Whisk flour, baking powder, and salt together in a medium bowl and set aside. This prevents streaks of baking powder from appearing in your baked cookies.
- Cream the butter and sugar:
- Beat softened butter with granulated sugar for about two minutes until it's pale and fluffy, which means air is trapped throughout and your cookies will be tender. You'll hear the mixer work a bit harder once it reaches the right consistency.
- Add the wet ingredients:
- Beat in your egg, vanilla, and almond extract until everything is combined and the mixture looks smooth and unified. This takes about a minute of steady beating.
- Bring it together:
- Gradually add your dry ingredients to the wet mixture, mixing on low speed just until you see no white streaks of flour. Overmixing develops gluten and makes cookies tough, so stop as soon as the dough comes together.
- Rest and chill:
- Divide the dough into two discs, wrap each in plastic wrap, and refrigerate for at least one hour. Cold dough is much easier to roll and cut, and it bakes into a better shape.
- Prepare for baking:
- Preheat your oven to 350°F and line your baking sheets with parchment paper so cookies slide off easily and bake evenly.
- Roll and cut:
- On a lightly floured surface, roll the dough to about 1/4-inch thickness, aiming for even height so all your cookies bake at the same rate. Use your shamrock cutter with confident downward pressure and slight twists to get clean edges.
- Arrange on sheets:
- Place each shamrock about an inch apart to give them room to spread slightly without bumping into their neighbors.
- Bake until golden:
- Bake for eight to ten minutes, watching for the edges to turn light golden while the centers still look slightly pale. This is the sweet spot for tender cookies; overbaking makes them crisp and dry.
- Cool properly:
- Let them sit on the pan for five minutes to firm up, then transfer to a wire rack to cool completely. This prevents them from breaking apart when you decorate.
- Make the royal icing:
- Combine sifted powdered sugar and meringue powder, then add water and vanilla gradually while beating on low speed. The texture should be smooth and glossy after five to seven minutes of mixing.
- Color your icing:
- Add green gel food coloring a tiny bit at a time, mixing well between additions until you reach your desired shade of festive green. Gel coloring is potent, so a little goes a long way.
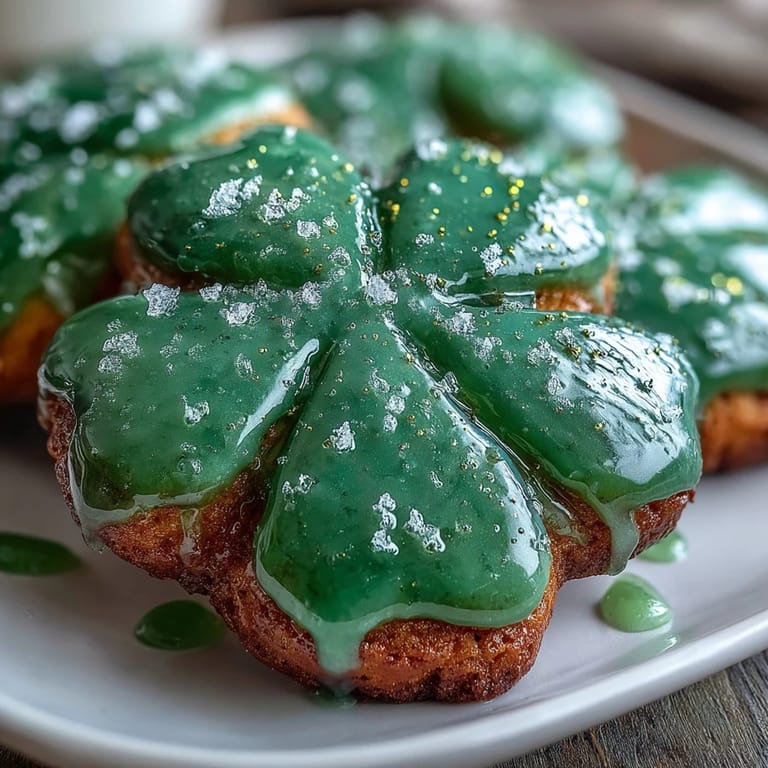
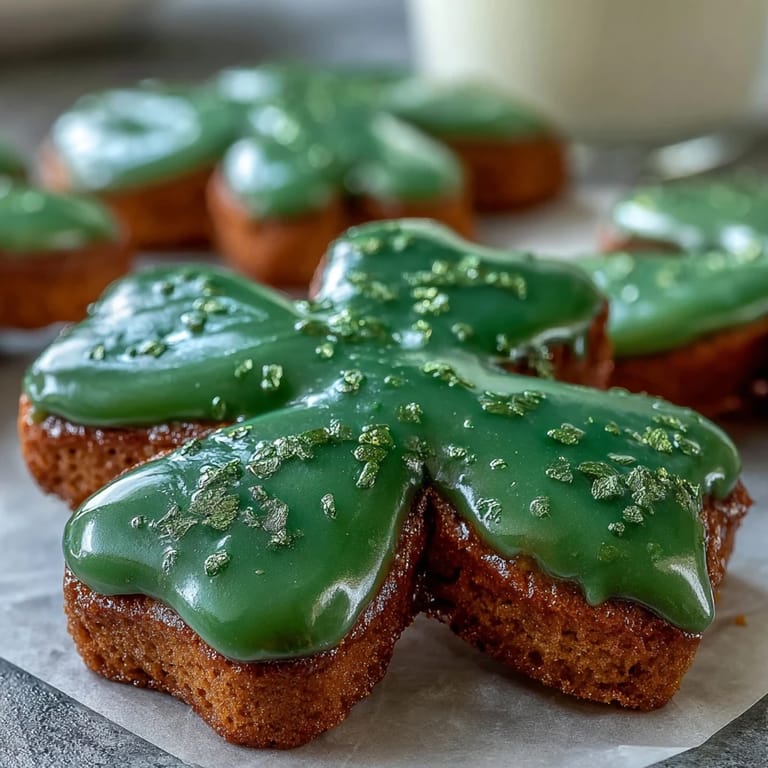
- Decorate with precision:
- Transfer icing to a piping bag fitted with a small round tip, then outline each shamrock first before filling in the center with a flooding technique. This creates crisp edges and a polished look.
- Let it set:
- Allow the icing to set for at least one hour before serving or stacking, which gives it time to harden and become food-safe for gift-giving.
 Pin it
 There's something almost meditative about piping icing onto cookies, the repetition becoming a rhythm where your hands relax and your mind quiets. My daughter eventually asked to help, and watching her tongue poke out in concentration as she filled in shamrocks made me realize these cookies are really about creating moments, not just desserts.
The Science Behind Tender Cookies
The magic of these cookies happens when you cream butter and sugar together until it's fluffy and pale. That process incorporates air into the fat, which creates lift during baking and makes each cookie tender rather than dense. It's why an electric mixer is worth its counter space, and why creaming is never something to rush through or skip.
Royal Icing Mastery
Royal icing intimidates people, but it's actually incredibly forgiving once you understand that consistency is everything. The key is starting with sifted powdered sugar and meringue powder, which gives you a blank canvas for adding water until you reach the exact texture you need. I learned this after my first batch came out grainy and disappointing, but once I switched to sifting, everything changed.
Making These Cookies Uniquely Yours
The beauty of this recipe is how flexible it is for customization without losing its character. You can adjust flavors, decorations, and presentation to match your mood or occasion, and each version feels special rather than derivative.
- Try adding edible gold glitter to wet icing for a lucky catch of shimmer and shine that catches light beautifully.
- Swap the almond extract for lemon zest or peppermint extract to create entirely different flavor profiles while keeping the same cookie structure.
- Stack and tie finished cookies with ribbon for an impressive gift that always makes people smile when they receive it.
 Pin it
 These shamrock cookies are proof that the simplest recipes, made with care and shared generously, create the memories that stick around longest. Make them for yourself or someone you love, and watch how a little green frosting becomes an excuse for connection.
Frequently Asked Questions
- → What gives the cookies their buttery texture?
Using softened unsalted butter creamed with sugar creates a tender, moist texture in the cookies.
- → How is the vibrant green color achieved in the icing?
Green gel food coloring is added to the smooth royal icing to create the festive hue.
- → Can almond extract be omitted without affecting flavor?
Yes, almond extract is optional and adds a subtle nuttiness but can be left out for a milder taste.
- → Why is the dough refrigerated before baking?
Chilling the dough firms it up, making it easier to roll and cut precise shamrock shapes without sticking.
- → How long does the icing need to set before serving?
Allow at least one hour for the royal icing to dry completely, ensuring it doesn’t smudge when handled.
- → What’s the best way to store these cookies?
Store in an airtight container at room temperature for up to one week to maintain freshness.